Friday, 4 May 2012

Olympic Tennis Animation

In this section of the blog, i am going to be talking and demonstrating the Olympic tennis animation that i have created for the final part of my "introduction to Animation" module.

Below you will see a few videos, please click them and see what you think of my animation, it will be shown in a Front side and perspective view so please enjoy.

I do apologise for the poor quality, this is the best quality i could show as blogger  wouldn't accept and higher quality video format.


Perspective

Left

Front

Here you can see my three animations, i tried to work with the rig to the best of my abilities, I'm really happy with the end result, although looking at my animating professionally i don't think its excellent, i would like to make the movements more fluent and add more drive and exaggerate some poses more to make the poses look more authentic and lifelike. 

When i started animating i started out basically looking at a few videos on YouTube of tennis serves and applied them to this animation, i thought they were very difficult to copy but i managed to get one of them very similar. 

I think if i had another shot at it i would put a lot more time and effort into it, i would really like to experiment with a different Rig because Max seems a little primitive and i would like more freedom of movement to experiment in my scenes for the future. 


Friday, 23 March 2012

Jump Cycle

Throughout the animation tutorials I have been given I have started to gain more skill relevant to character rigging and character manipulation, even though my animations are still a bit sketchy and no of the highest standard, I understand the principles and how to create an effective animation overall. On the other hand I do have some issues trying to execute said animation effectively.

Below are three animations i have made, one is viewed in two perspectives, these are our jump animations that we have been asked to animate as one of our tasks.

Animation 1 - Standard Jump


Animation 2 - Leap Jump (experimentation)


Animation 3 - Leap Jump (Alternate Perspective)


Wednesday, 21 March 2012

Emotions and Poses

In the last week we have been disguising different types of poses and expressions, to see how to make characters look more natural and make them come to life with a few simple rules.

Task 5 - Character poses
For this task i have had to come up with some different unique poses using the Max character rig, I think this has been a very enjoyable experience and its helping me to understand the rig a lot better as i work with it more. I have come up with about 6 different poses that i think will work well.

Max Angry


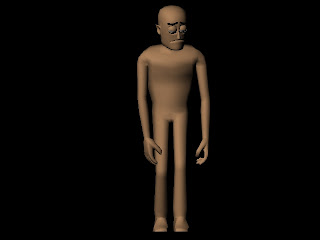
Max Sad


Max holding a torch in the dark


Max in Shock


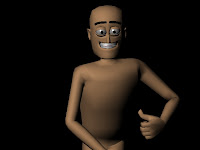
Max Thumbs Up!


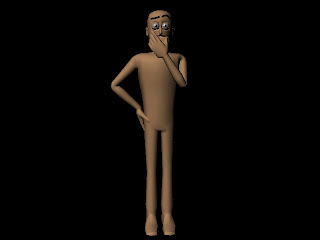
Max Thinking


Walk Cycles

Recently in my practicals, I have been introduced into the different aspects of Inverse and Forward Kinematics, also referred to as IK and FK. This delves into walk cycles and how the best way to animate a character rig gives you an excellent result.

Inverse Kinematics works on a on a target system where you control certain joints of the body using the X, Y and Z axis. Although this is a very good technique of animation, it is a little sketchy because it doesn't deal with natural curves of the body, and fluid movements.

This is where Forward Kinematics kicks in, Instead of using a targeting system where you place where the limbs will be, it uses a rotational system, so when it comes to getting a nice fluent swinging arm movement  when a character is walking, you can rotate the shoulder and it will create a nice arc instead of a blocky movement.

Task 4 - Walk Cycles

For my fourth task I have been issued a brief where i am supposed to create a accurate walk cycle, this means i have had to take into consideration different types of poses and movements, a lot of reference has been looked upon before i made my animation. 

Here you can see a clip of a 124 frame animation , lasting one second, which is the standard length for a walk cycle when it comes to animating a character. 


Here i have added a little more life to the walk cycle to make it seem more natural, I have started to manipulate the arm movements more.


Here is the walk cycle at a slightly different angle.


Monday, 6 February 2012

Character Rigging

IN my lesson i have been focusing a lot more on character rigging and today i had the joyful task of manipulating a character rig that had already been created for a specific model. This was a lot of fun and a really enjoyable process because i was able to visually differenciate differences between the theory and the practical sides of things because the theory can get confusing sometimes.

Below you can see a character model that has been riged and made ready for use, his name is Max and he is designed for Maya.  I downloaded him from this website which is quite resourceful, it was supplied to us by our lecturer Sam and i ended up registering to it because i found it so useful.

www.creativecrash.com


Here in this image you can see Max!!!!!!!! this is the character model that i downloaded, as you can see, he is showing off at the moment with his Kung Fu skills. 


Here you can see I have just been trying to manipulate the character rig, its a very enjoyable process for me, even though it has its difficulties. there are so many things you need to consider, is the model anatomically correct in its current stance? would a human move like this? etc

Here you can see i have uploaded a video of me manipulating the rig, its not very good but you can see that i am getting a feel for this sort of work, i jumped right in straight away and loved every minute of it. 


Sunday, 5 February 2012

Basics of Animation in Maya


In this particular area of study, I have been looking into the theory of animation and trying to understand the technicalities of 3D space in terms of movement, kinematics and so on.

In my first lesson we had a basic theory lesson that revolved around thinking about an inanimate object constructively, this happened to be a bouncing ball. We had to think to ourselves..."to make something look as realistic as possible, what elements and characteristics must it have in terms of animation".

This brought me onto thinking what really happens when a ball is bouncing. It can be affected by so many different elements, for example:-

-What is the climate? A ball bounces higher if the temperature is high.
Is there an External Force?
-Is the ball solid or soft? A softer ball implies that it will bounce less.
-What is the mass, will the ball will bounce higher if it is heavier?
-What is the scale? If the ball is larger, it has a bigger diameter which means it will bounce longer and higher.
-In terms of animation, I had to think of how I could portray what a bouncing ball would actually look like, so to do this I had to think of the following qualities:-
-Is the ball going to be heavy?
-Is it going to cover a large surface area?
-Will it have squash and stretch characteristics? So if the ball lands, will it become smaller but wider?

All of these elements are key for creating a good animation; this exercise is brilliant, because even though it may seem simplistic, it gets you thinking constructively about how an actual real life scenario would happen.

Here are some videos i have recorded, of me and my friend Charlie bouncing different types of balls to see how long it takes for them to stop moving, as silly adn simple as this looks, its actually very important to understand how gravity works and how you can manipulate that with external force, such as throwing the ball instead of dropping it.

Here i will show a series of test videos, experimenting with different types of balls, taking into consideration the mass, speed and external force in which they fall and land. 
 
5.7 Seconds


8.3 Seconds

7.3 Seconds

7.5 Seconds

2.9 Seconds

1 Seconds

4.3 Seconds

After Collecting all of my reference material, a task was set where I had to create a bouncing ball animation. I did this using Maya. We did it using the Graph Editor using a series of tangents and handles which helped us make the bouncing ball look more realistic. 

Bouncing Ball Animation

Animation 1 - Soft Foam Ball (With Squash and Stretch) 

Animation 2 - Ping Pong Ball (no Squash and Stretch)


Task 3
After we experimented with ball animations, we were asked to create an animation that had ghosting  incorperated into the animation so the viewer could see the trail of the ball itself as it bounced throughout the scene. 

Ball Animation with Ghosting


2D Digital Techniques - My Concept Design

In this blog I shall be exploring the character design that I have created for my project for 2D Digital Techniques. I am very excited about this project and am very keen to get started with the presentation of my process of development of my silhouetted character design.

Before I created my final project piece, first I had to create an initial concept, but to do that I needed to have a few draft sketches of different poses I might use as I was doing a character design.

The premise to this character is that a female woman has been taken in from a barren waste land, at the brink of death; she is "saved" by the elitist empire. With all of the amazing technology that they possess, they try to genetically modify the woman and create a super soldier, but seeming as she is so badly damaged, they use machinery to bring her to life and keep her stable, hence the cyborg look.

The picture portrays the lady in her state of being born as a cyborg. Similar to the terminator judgment day film, where he is teleported through time but he has no clothing. This is the same for my character; she is in her initial state as she emerges from her chamber.

((please note that i could not upload images into this blog due to technical errors, so i have supplied Ten development images with the email containing this link, the images correspond to the relevant image name in the brackets))


The next stage, was where I started painting out the silhouette of a man, I decided to create a male warrior at first so I used the silhouette as a basis for the initial start of my painting.

In the next image you can see that I had a change of heart and decided to change from a male character to a female character instead. To do this I created a new outline of a female torso, I thinned the arms and added more curvature in the outline suggesting female anatomy.


In the next image you can see that I filled in the silhouette, I did this so that I can add some mid-tone greys and add highlights to make them stand off the black more effectively.


In this image you can see that I started to experiment, I was using harder and softer light shading, the softer shading being on the right and the herder on the left, I enjoyed doing this because it was slowly teaching me what values and shades I could use effectively.
In this image you can see that I have started to add stronger shades to the silhouette suggesting muscles and reflected surfaces, I have suggested shadows and rim lighting.

In this you can see that I have started to add tubing, this suggests cyborg technology and makes the figure seem more futuristic, it also adds more characteristic to the image itself.


In this image you can see that I discarded my second silhouette and made the size of the silhouette bigger, I added some more lighting detail and added some white dots on the silhouette especially around the head, to suggest lighting and shiny surfaces.


Here in the 8th image, you can see that I have simply just added a background using hue and saturation, this elevates the picture slightly and pronounces the rim lighting, bringing the silhouette off the page.

Last but not least, I finalized my silhouette and added some texture to the background of my image, giving a little texture to the scene so it doesn’t seem so static and plain.